Achieve a welding solder to the soldering iron
Published on 03/27/2015
We'll explain the simplest method to achieve a Tin solder to connect your battery to a wire.
First of all some recommendations are necessary to connect a battery to a device.
The thread must never be welded directly onto the battery polarities. The heat of the soldering iron will irreparably damage the battery, more welding could not hang on the nipples which have a special coating.
When purchasing a battery on the batteries4pro site, you have the choice between element:
- nu,
- the element terminals CLG,

- or the element terminals HBG.

These 3 choices will be important when mounting your battery in your device. The welds will be carried out on the lugs to be welded and only at this location.
To start a weld with Tin you need a soldering iron, a Tin wire, sponge, and a clear workspace.
Welding is done by heating the two metal parts to be welded (in this case, soldering lug and wire in place) and by applying the wire welding (mixing tin + lead + welding flow) that melts at heat and combine with the parts to be soldered. This allows to obtain a metallic bond between the two sides, which ensures both the electrical continuity and mechanical strength.
The failure of the railway shall not be too thin to begin: very fine failures are useful for e.g. soldering of SMD components, but they are fragile, they writhe easily when not only welding large components. The failure must be sharp but solid, not flat as in plumbing, which is too big. Low cost without temperature control irons are generally equipped with failure of ideal size...
- Our soldering 30W iron should be fine for occasional use: Click here to see the product datasheet
- A soldering iron top range for professionals is here proposed I - Con Nano
- An iron soldering gas for all tinkering at home DREMEL VERSATIP
Caution: the temperature of the iron must be adapted to the type of welding used. The son to welded former lead-Tin had a melting temperature lower than the new alloys without lead wires. More the welding wire is thick, more difficult to melt. An iron (at fixed temperature) hot little or less powerful may be suitable for wire end but not for the thick wire.
Frequently clean the tip of the hot iron on the moist sponge. Indeed waste accumulate on the tip and may interfere with the weld. Use either an old natural sponge or wet toilet paper, but not of synthetic sponge that damage the iron. It is also useful to melt a little solder on the tip, so that it does not, in particular oxidize before turning off the iron.
Do not to scratch the tip of the iron, especially with a metal object, to clean: indeed, this removes the substance plated on iron which facilitates sprawl of the weld. Once scratched, iron is less good because the weld shape balls top instead of sinking to the paw welding.
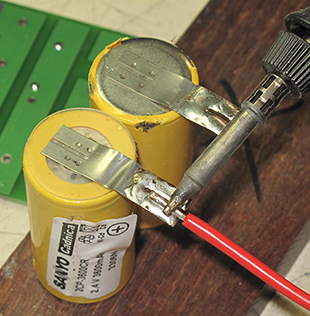
- The first step of the weld is to Tin the 2 parts to be welded separately.
The wire must be stripped to the proper length and the stripped portion should be straight and clean.
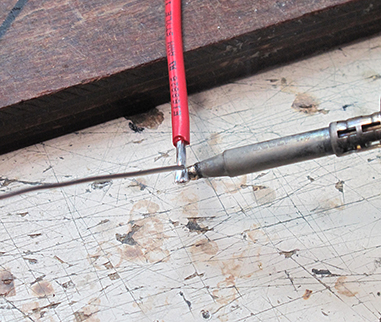 | 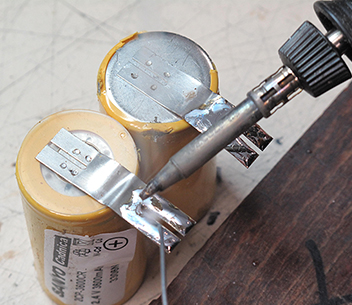 |
The tinning of the lugs to be welded must be thick, smooth and shiny, in order to lay the wire in a second time.
If the weld refuses to spread on the bead or the tab, it can be an indicator of oxidation of the circuit or component. It must therefore scrape (e.g. glass paper) the recalcitrant surface and repeat. Is not the penalty to add three times more welding, which will not improve the quality of the weld and would hide the problem.
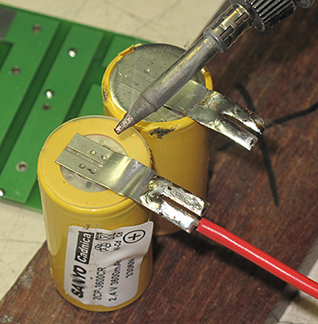
- Then the weld is to press both iron lug soldering and electrical wire. The two elements must be heated at the same time otherwise the welding will not hold.
Do not melt the solder directly on the blade: she could not properly spread and make a ball
- Remove iron without moving the wire to the terminal because the Tin is still liquid. Wait a few seconds so that the Tin solidifies and the wire is well attached to the battery.
Your welding is now complete.
Some principles of security
- Do not directly inhale the fumes of solder (Tin and lead vaporized, carcinogenic resins...): therefore, choose a well-ventilated room. It is healthy to have a fan nearby, even at low speeds (though he is led directly on the iron, otherwise it cools...).
- The soldering iron is hot: attention to Burns! Attention to the part of the railway between the tip (the failure) and the sleeve: it is hot also.
- Check the tip of the iron unscrews not the handle, which is dangerous (Burns). Screw in the case of release.
- Do not place the soldering iron on anywhere: it needs a specific stable. Attention especially in light irons, who are coached by their mains cable and which may fall, need to put on a fireproof support.
- Do not shake the soldering iron, with drops of Tin in fusion, on the carpet, paper, or any other flammable material.
- Never weld a mounting power: it is dangerous for the user and for mounting. Always unplug before doing anything on a component or on a printed circuit board.
Post related products
-
Multifunction Dremel VersaTip gas soldering iron F0132000JA
-
Soldering iron economic 40W + Tin 2433-30
-
Pellenc P2000 Secor Battery Kit 2600369
-
ARTS battery 3.6V 4Ah 3VTD 131607 131607
-
Replacement 24V 4.5Ah for bike Yamaha PAS battery RECVELO24/5
-
Replacement for bike Matra I-Step 24V 9Ah battery RECVELO24/9
-
Battery 3.6V.1Ah for Black & Decker KC9039 and KC9036 3HR4/5SCUCC-C
-
Battery 3.6V 1.9Ah for cutting edge Bosch 2607335002 2607335002
-
Battery drill 4.8V 1.3ah lead 4VR1.2 133744
-
Internal battery 7.2V drill Makita M001, M003 makita-M001
-
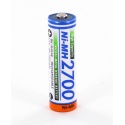
Rechargeable battery 1.2V 2700mAh NiMh AA LR6 HR3U-2700
-
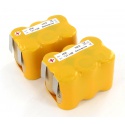
Reconditioning batteries 2 x 7.2V 3Ah for Pellenc AP25 and P80 REC-AP25
Express delivery
- By carrier or
- By Postal Service
Professional Quality
Secured Payment
Search in Blog
Par Nathalie S. (Annemasse, France métropolitaine) le 17 Apr. 2025 :
Par Stephane C. (Viviers du lac, France métropolitaine) le 17 Apr. 2025 :
Par Jacques C. (L' ISLE SUR LA SORGUE, France métropolitaine) le 15 Apr. 2025 :






COMMENTS
No customer comments for the moment.